Feb 20, 2024
A complete guide to Umami - self-hosted analytics
What is Umami?
Umami is a self-hostable analytics platform. Like Google Analytics, but privacy preserving, open-source and without extreme tracking. You can have a look at their website if you're interested and want to learn more.
Self-hostig on Linux
You can self-host Umami to ensure that all analytics data stays on your system and you have full control.
The Umami developers also provide a cloud solution you can subscribe to if you don't feel comfortable self-hosting.
Prerequisites
- NodeJS
(v18.17+)+ npm - MySQL
(v5.7+)or PostgreSQLused in this guide(v12.14+) - Apache2 or your webserver of choice
- Certbot + webserver extension
Database setup
To initialize PostgreSQL, run this command on your system:
postgresql-setup
Enable and start PostgreSQL:
systemctl enable --now postgresql
Login to your database server:
sudo -u postgres psql
Umami needs a database. Create it like this:
CREATE DATABASE umami;
To ensure seperation between your databases, create a user for Umami:
CREATE USER umami WITH ENCRYPTED PASSWORD 'asecurepassword';
The user umami now needs permission to use the database umami. You can grant all necessary rights like this:
GRANT ALL ON DATABASE umami TO umami;
\c umami  -- enter database
GRANT ALL ON SCHEMA PUBLIC TO umami;
You've now setup your database. Exit the SQL shell:
\q
Installation
Umami uses yarn for packaging. We need to install it first:
npm install -g yarn
Let's download Umami's source code and compile it:
cd /opt
git clone https://github.com/umami-software/umami.git
cd ./umami
yarn install
Before finally compiling Umami, create /opt/umami/.env:
DATABASE_URL=postgresql://umami:asecurepassword@localhost:5432/umami
Build Umami:
yarn build
Running as a service
You definetly want to run Umami as a service. Follow these steps if your init system is SystemD.
Create a system user and group for Umami to use:
useradd -r -s /bin/bash -U -d /opt/umami umami
chown -R umami:umami /opt/umami
Add umami.service to /etc/systemd/system/:
[Unit]
Description=Umami Analytics
After=network.target postgresql.service

[Service]
User=umami
Group=umami
WorkingDirectory=/opt/umami
ExecStart=/usr/local/bin/yarn run start
Restart=on-failure
ReadWritePaths=/opt/umami

[Install]
WantedBy=multi-user.target
Finally, start and enable autostart for Umami:
systemctl daemon-reload
systemctl enable --now umami.service
Reverse proxy
Accessing Umami should happen via a secure connection on a standard port. We need a reverse proxy to archive this.
I'm running Fedora Server, so all website configuration will be saved to /etc/httpd/conf.d/. Other distributions often use /etc/apache2/sites-available and a link from ../sites-enabled.
First, request a SSL certificate via Certbot:
certbot --apache -d analytics.konstantintutsch.com
Insert this configuration into /etc/httpd/conf.d/umami.conf:
<VirtualHost _default_:443>
    ServerName analytics.konstantintutsch.com
    ServerAdmin webmaster@konstantintutsch.com

    SSLEngine On
    SSLCertificateFile /etc/letsencrypt/live/analytics.konstantintutsch.com/fullchain.pem
    SSLCertificateKeyFile /etc/letsencrypt/live/analytics.konstantintutsch.com/privkey.pem
    Include /etc/letsencrypt/options-ssl-apache.conf

    <FilesMatch "\.(html?|txt|css|js)$">
        SetOutputFilter DEFLATE
    </FilesMatch>

    SSLProxyEngine Off
    SSLProxyVerify none
    SSLProxyCheckPeerCN off
    SSLProxyCheckPeerName off
    SSLProxyCheckPeerExpire off

    <Location />
        ProxyPass http://localhost:3000/ retry=0
        ProxyPassReverse http://localhost:3000/
    </Location>
</VirtualHost>

<VirtualHost *:80>
    ServerName analytics.konstantintutsch.com
    Redirect permanent / https://analytics.konstantintutsch.com/
</VirtualHost>
Changing the default login
Now that your Umami instance is live, remove the default login via a browser.

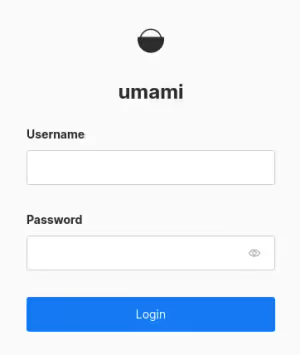
Login with user admin and password umami.

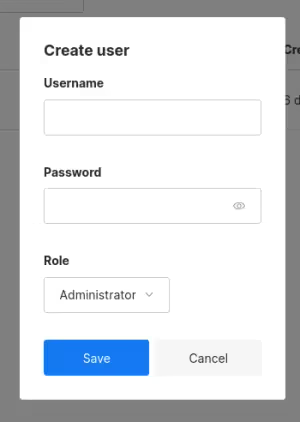
Once you've logged in, go to your.instance/settings/users and create a new user. Select Administrator as the role.
You can now logout and login with your new user. Navigate to the same page and delete the user admin.
Umami is setup. That's it! 🤩
Backup and restore
You only need to backup the database. We can use pg_dump to archive this.
sudo -u postgres pg_dump umami > /opt/umami.psql
Make sure to move umami.psql to multiple locations and to keep it inaccessible!
For restoring, reinstall Umami but don't login and stop Umami. Enter the SQL shell:
systemctl stop umami.service
sudo -u postgres psql
Delete your Umami database, create an empty one and regrant all rights:
DROP DATABASE umami;
CREATE DATABASE umami;
GRANT ALL ON DATABASE umami TO umami;
\c umami  -- enter database
GRANT ALL ON SCHEMA PUBLIC TO umami;
Restore from your umami.psql dump:
sudo -u postgres psql umami < ./umami.psql
Your Umami instance has been restored. You can start it now 😌
systemctl start umami.service
Using Umami
This section is about using Umami's basic features.
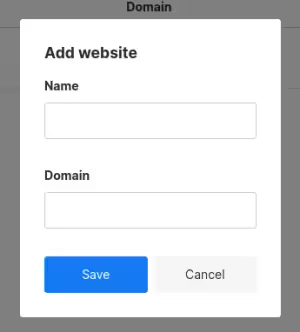
You first need to add the website you want to track to Umami. Navigate to your.instance/settings/websites and add your website.

Once you've added your website, click on the Edit button besides it's name. Navigate to the heading Tracking code in Umami's webinterface's tab bar. Add the <script> tag to your website's <head>.

If you also want to track which links, buttons or else are clicked on your website, you can add the data-umami-event attribute to them.
<a data-umami-event="social-github" href="https://github.com/konstantintutsch">GitHub</a>
Analytics are setup now too! That's it 🥳